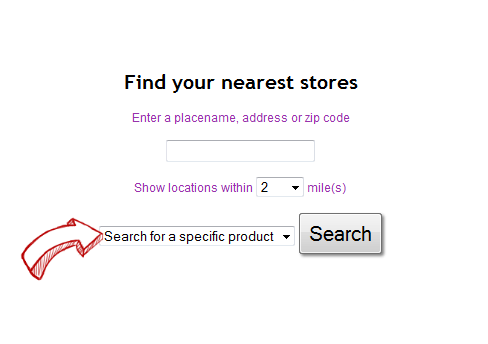


One of the most frequently asked questions we get at Blipstar is "can I set up my store locator so that customers can filter based on the type of product a store sells?". The short answer is yes, and this tutorial is the slightly longer answer.
It explains how to use 'tags' in your data to enable filtering by product, service, category or any other classification you'd like to use (it's entirely up to you). Here's a simple guide to setting up filtering in Blipstar. It assumes you've created an account.
Tip: If you want to display different icons for different store types check out the map icons tutorial.
Tip: Although these instructions refer to products, any type of classification can be used. For example a chain of supermarkets might have tags for 'Cash machines', 'Gas', 'Deli' and so on.
It's obvious, but we'll say it anyway: make sure the spelling of each tag/category is consistent in your data otherwise each variation will be treated as a separate tag/product/category.
As a simple example, suppose you sell three types of widget. Shop A stocks them all, Shop B only stocks large widgets and Shop C stocks small and medium widgets. You'd use something like this for your data:
| Name | Address | Tags | Tags | Tags |
|---|---|---|---|---|
| Store A | Made up address 1 | Small Widgets | Medium Widgets | Large Widgets |
| Store B | Made up address 2 | Large Widgets | ||
| Store C | Made up address 3 | Small Widgets | Medium Widgets |
| Name | Address | Tags |
|---|---|---|
| Store A | Made up address 1 | Small Widgets,Medium Widgets,Large Widgets |
| Store B | Made up address 2 | Large Widgets |
| Store C | Made up address 3 | Small Widgets,Medium Widgets |

That's all there is to it. Users will be able to narrow down their search by choosing a tag.
There are lots of settings you can change in Settings > Tags.
You can also define a second set of tags, independent from the main set. To do this you need to go to Settings > Tags and turn on the setting for the second set of tags. Then you can add them by using a column in your data called Tags2 or via the Tags2 field in the online editor. Likewise you can define a third set of tags in Settings > Tags by turning on the setting for the third set of tags. Then you add them by using a column in your data called Tags3 or via the Tags3 field in the online editor.
If you can think of any useful features that would enhance tag/category filtering in Blipstar-powered store locators we'd love to hear from you. Don't forget you can configure various aspects of tag filtering by logging in and going to Settings > Tags.
Tip: If you want to have different store locator "views" (that limit searching for a particular tag or product) you can set this up in the Deployment wizard. In the Tags step of the Deploy wizard click "Yes" to use tags, and select the tag (or tags) you want to restrict results to. Next, uncheck the option allowing the user to select the tags (so you're effectively forcing them to use the specified tags). When you publish the locator the results shown will be limited to the specified tag(s).
Alternatively if you want to define it manually you simply add "&tag=###" to the blipstar URL (where ### is the name of the tag or product, URL encoded). For example to have a store locator which only searched for stores with a tag called Toys you'd use:
https://viewer.blipstar.com/search?uid=2435124&tag=Toys