Showing a Store Locator in WordPress

Wordpress    

Adding a store locator to your WordPress site is easy.

Background

Embed store locator in your WordPress page

WordPress started off as a blogging tool but has grown into a fully-featured Content Management System. It's extremely popular too - 25% (yes, 1 in 4!) of websites around the world run using WordPress.

One of the reasons it has been so successful is people find it easy to use. Millions of small and medium sized businesses use WordPress for this very reason. Another reason is the huge number of Wordpress plugins available, many of them free, to add widgets and functionality to a site.

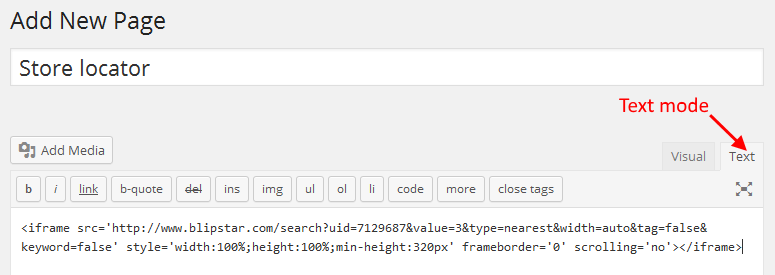
As you know, creating your own store locator with Blipstar is easy, but getting it to appear in a WordPress site used not to be as simple as it should be. Thankfully more recent versions make the process much simpler - a simple cut and paste job!

Your store locator appears exactly the same as if it were integrated directly into a website. So you get features such as:

  • Class-leading mapping
  • Turn-by-turn driving directions
  • Special mobile/smartphone mode
  • Custom icons, attributes and look and feel

Instructions

  1. Go to your WordPress admin Dashboard
  2. Go to Pages > Add New.
  3. Enter a suitable name for the page (e.g. Store locator).
  4. Make sure the page editor is in Text mode (and NOT Visual mode) - see the screenshotas it won't work unless it's in Text/Code mode. If using the Gutenberg editor, click on the three dots icon, then choose Edit as HTML.
  5. In Blipstar, go through the Deploy wizard and paste the code snippet in your new WordPress page.
  6. Click Publish - your store locator should be embedded in the page.
Providing store locator solutions since 2006.   Share: Linkedin  |  Twitter  |  Google+  |  Facebook  |  Pinterest