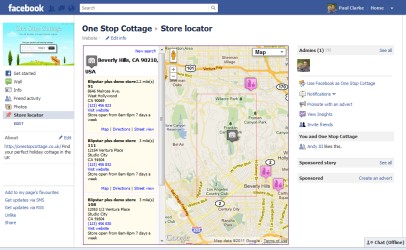


With well over one billion active users, tapping into the Facebook social network is fast becoming a necessity for any business or organization. And whilst many have predicted its demise over the years it's still the king of social networks. With the Blipstar viewer plugin you can add your store locator to any Facebook page you've created. It only a takes a minute and provides a convenient user experience for people who discover you on Facebook rather than your website.
Although it's easy to create a Facebook page (the "Create a page" link in the Facebook footer) and add basic information, to stand out from the crowd you really want some customized content. After all, not many people are going to read the 10 Year Company Strategy you copied and pasted from your site, however exciting it may be... A store locator is a genuinely useful tool to have and with Blipstar it's a breeze. The process for adding your own pages (also known as Tabs) to a Facebook page is as follows: